Adding Quadratic Curve Segments
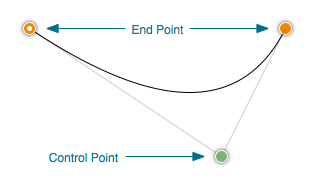
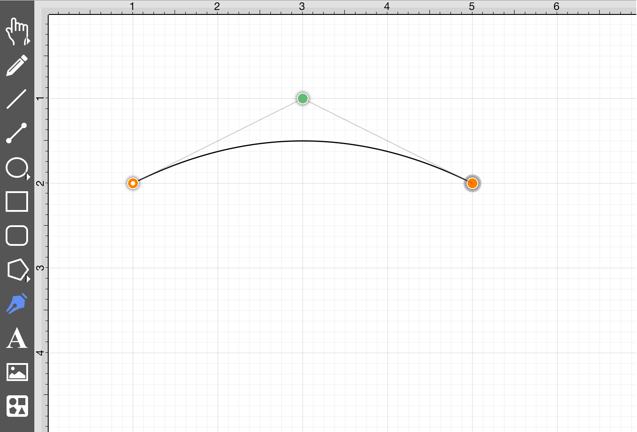
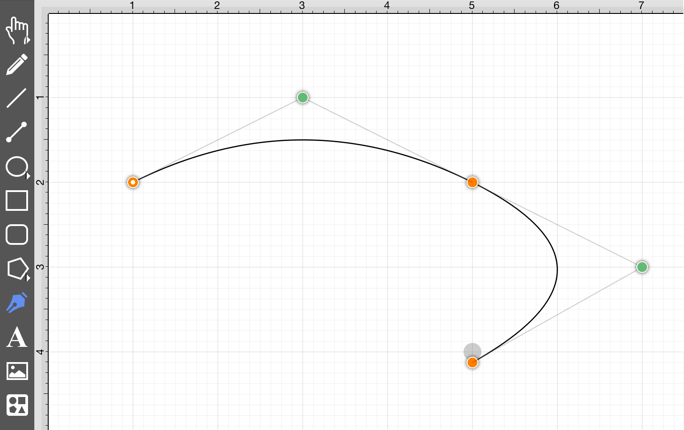
A Quadratic Curve is a line segment with two end points and a control point that determines the exact curve to be drawn. The figure below illustrates an example of a quadratic curve.
Two core gestures are used when creating path segments. A Single Tap adds an end point and a Touch/Drag gesture combination adds an end point with a corresponding control point. Since a Quadratic Curve contains two end points and one control point, the above mentioned core gestures provide two ways to create this type of path:
- Performing a Single Tap and then a Touch/Drag combination.
- Performing a Touch/Drag combination and then a Single Tap.
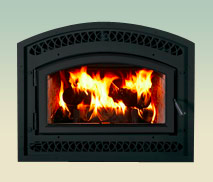
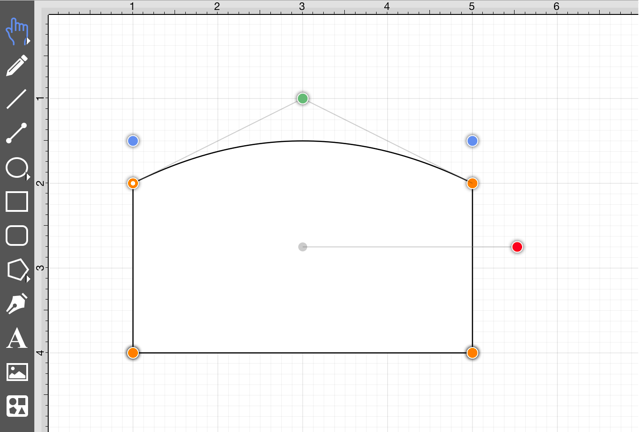
For example, the Path Tool can be used to draw a shape resembling the fireplace below by combining 3 line segments and one quadratic curve segment.
The following instructions outline the process we would take to do this.
-
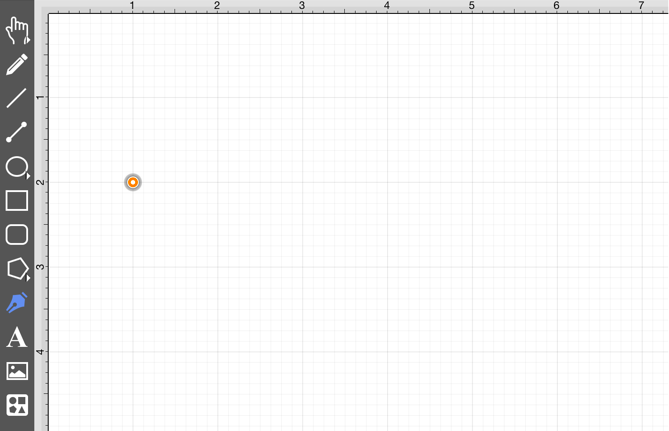
Select the Path Tool in the Drawing Toolbar.
-
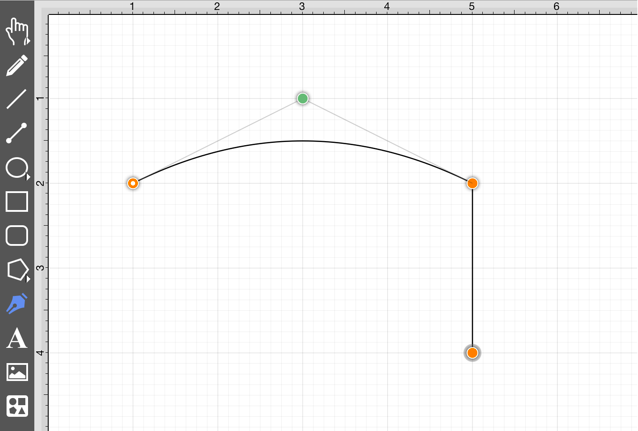
Touch (but do not release) on the Drawing Canvas at the location where the starting point for the path should be established. Any of the corner points could be a starting point for creating this shape; however, the upper left corner point is the starting location for this tutorial. Next, drag the segment to the established control point location without releasing the Touch action. TouchDraw will draw a lashed line from the start point to the control point while the dragging action is performed and then show a slightly transparent circle in the control point location upon completion.
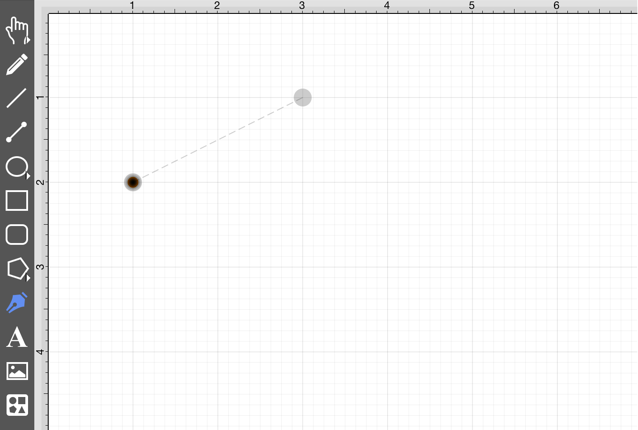
A control point is displayed in gray when it has not been used and is referred to as a “phantom” control point. This characteristic provides a hint to the TouchDraw application that it should function as a control point in scenarios where the next drawn segment is a curve. The control point is ignored when a Straight Line Segment is added.
-
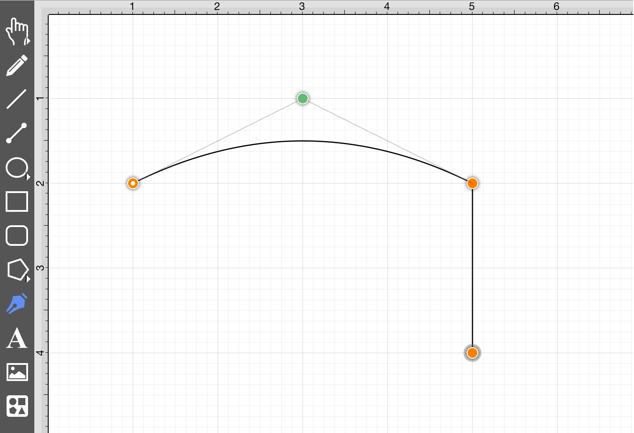
Next, tap on the Drawing Canvas location where the second corner of the path should be (the upper right hand corner). This action creates a quadratic curve between the two end points, with the added control point functioning as an indicator to TouchDraw as to how to draw the curve.
The handles for curve control points are green. The color and look of the control points are an indicator of how they relate to the selected shape. Refer to the Handles Reference page to learn about the types of handles.
-
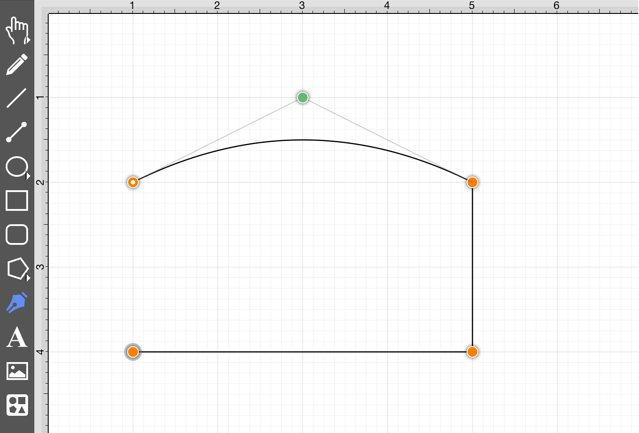
Next, tap on the drawing in the location where the third corner of the path should be. As in the previous examples, it will have drawn a line from the last created point to the new point.
-
Next, tap on the drawing in a the location where the fourth corner should be. Again, the same results are provided as before.

-
To close the shape, either Tap on the start point (the orange handle with a white dot in it) or Triple Tap anywhere within the Drawing Canvas. This action closes the shape and exits the path tool (assuming Sticky Mode has not been enabled).
In addition to the approach above, the same figure can be drawn performing these actions in a slightly different order, as shown below:
-
Tap in the upper left hand corner to create the first point of the curved portion of the fireplace.
-
Perform a Touch/Drag gesture combination at the location where the ending point of the curve segment should be. Drag the “phantom” control point outward to the right and bottom until the desired curve has been created.

Performing an Option/Tap gesture combination on any location in the Drawing Canvas alters the position of the “phantom” control point to the selected location. Refer to the Path Tool section to learn more about this action.
-
Add a line to the next corner in the shape by tapping where the next end point should be located.
-
Obviously, this is not the desired result. If a “phantom” control point exists and a Tap is performed on the drawing, TouchDraw will use this control point to create a quadratic curve segment. In this case, the “phantom” control point should be ignored and discarded to draw a straight line segment from the last end point to the new end point. Tap on the Undo Button located in the Top Toolbar to remove this segment addition.

-
To draw a straight line from the last end point to the new end point, enable the Function Key Feature and tap on the next end point location in the Drawing Canvas. This action instructs TouchDraw to ignore the “phantom” control point and to draw a straight line.
-
Tap on the next corner end point to create the bottom of the fireplace.
-
To close the shape, either Tap on the start point (the orange handle with a white dot in it) or Triple Tap anywhere within the Drawing Canvas. This action closes the shape and exits the path tool (assuming Sticky Mode has not been enabled).
