Selecting Multiple Figures in a Drawing
By default, a previously selected shape will be deselected when another is selected; however, TouchDraw for iPad does support Multiple Selection.
Multiple Selection in TouchDraw for iPad is accomplished by using the Function Key Feature in combination with the normal selection gestures. The bundled floor plan sample will be used to show how this feature can be used to select multiple shapes in a defined area, as shown below.
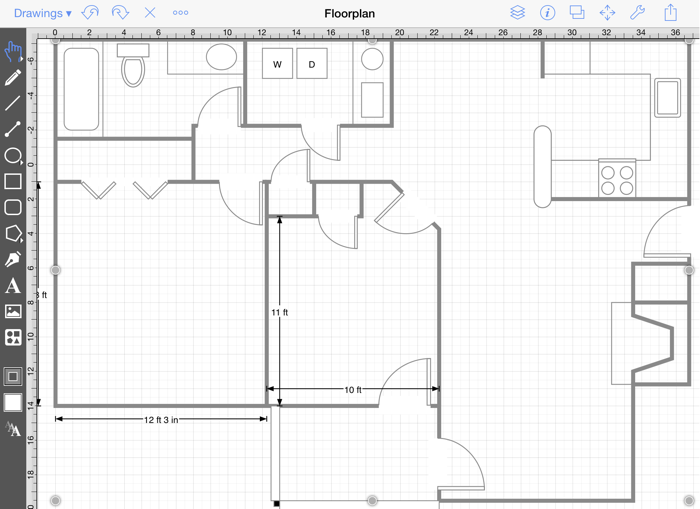
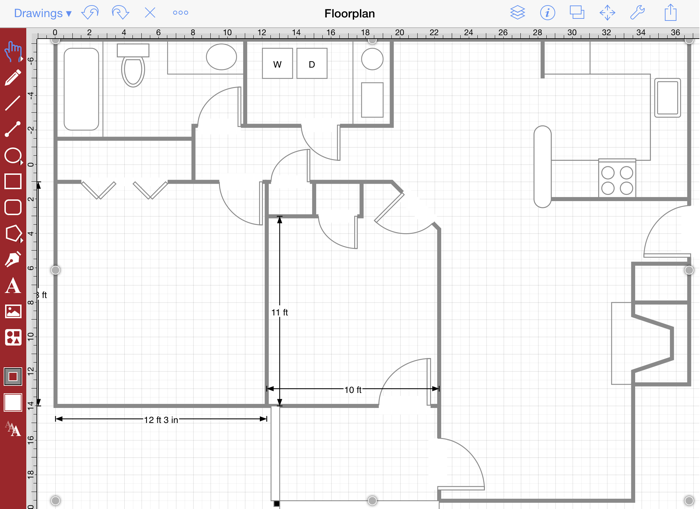
To enable the Function Key Feature, press and hold on the empty portion of the Drawing Toolbar for ~1 second until it turns red and continue to hold a finger on the toolbar while using the other hand to tap on additional figures. It will remain enabled as long as the utilized finger/thumb remains held on the toolbar. While enabled, selection gestures can be used to add or remove figures from the multiple selection.
With the Function Key Feature enabled, tap on each figure in the drawing to select it and then release the utilized finger when finished to disable this feature. The same action can be performed to remove a selection in a drawing. The Function Key Feature is disabled as soon as the used finger is released from the Drawing Toolbar.
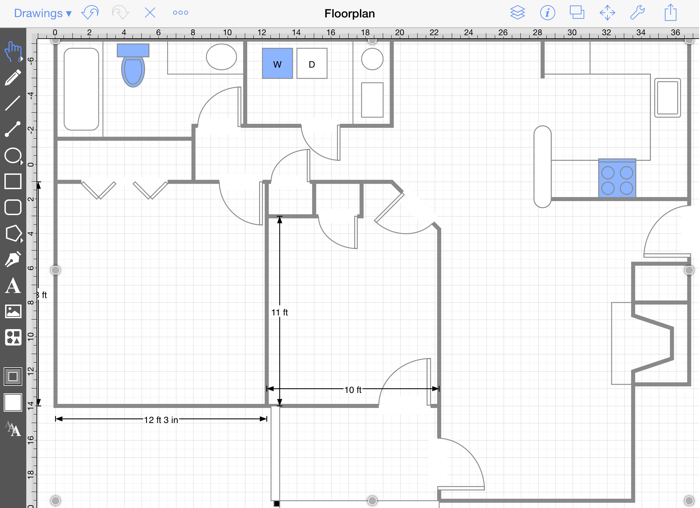
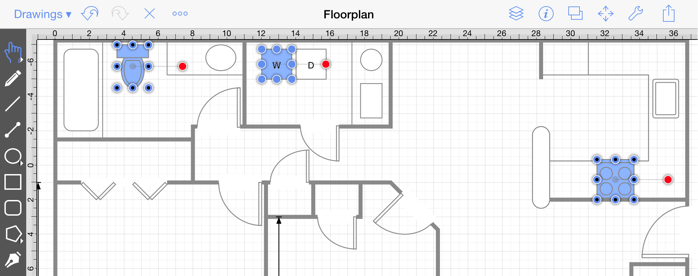
In the example below, we will be using the Function Key Feature to select the Toilet, Stove, and Washing Machine in the above shown Floor Plan and then change the selected figures Fill Color to a solid, light blue. The Floor Plan will appear as shown below once all steps have been completed.
See it in Action!
Follow the steps below to learn how to select multiple figures within a drawing and then change the fill color for the selected figures.
-
First, enable the Function Key Feature by pressing and holding on the empty portion of the Drawing Toolbar for approximately 1 second until it turns red. Do not remove the utilized finger from the toolbar until all selections have been made.
-
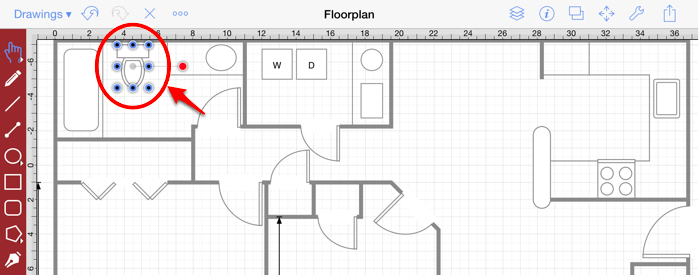
Second, we will select the Toilet in the Bathroom Area by performing a Tap on the figure. Remember to keep the utilized finger on the Drawing Toolbar to make additional selections.
-
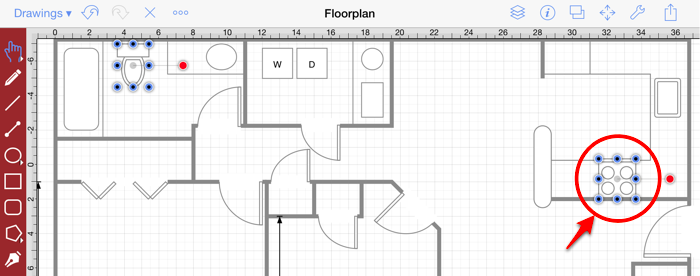
Third, we will Tap on the Stove in the Kitchen Area to make a second selection. Remember to keep the utilized finger on the Drawing Toolbar to make additional selections.
-
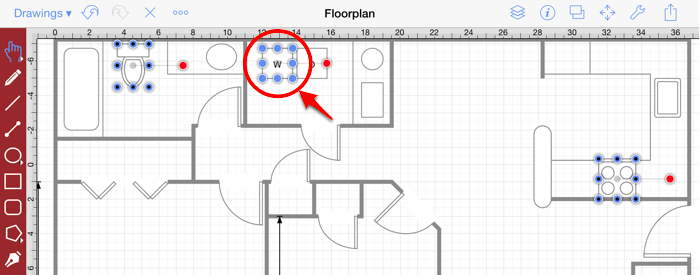
Next, we will Tap on the Washer in the Utility Area to make the final figure selection. Remove the utilized finger from the Drawing Toolbar once this step has been completed.
-
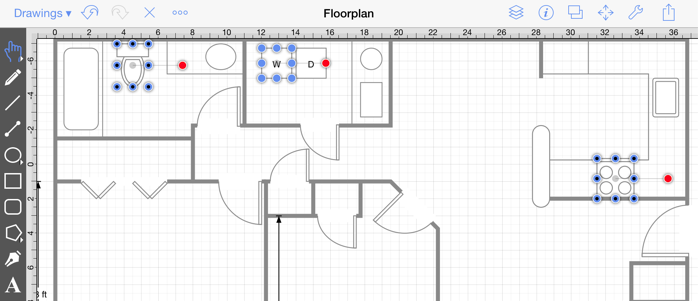
Below you will see the Floor Plan with all three selected figures and the Function Key Feature disabled.
-
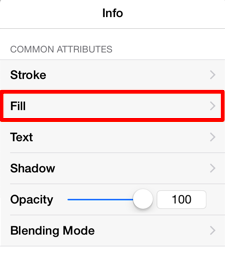
Next, we will change the Fill Color of all three selected figures within the Floor Plan. Press on the Info Button in the Top Toolbar and then Tap on Fill to make changes to the Fill Color of the selected figures.
-
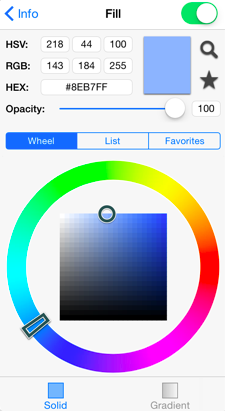
To change the Fill Color, select a fill type (solid or gradient), shade, etc. from the Color Wheel as shown below or use the List to make a selection. In this example, a Solid light blue is selected.
-
The Floor Plan will appear as shown below once the Fill Color has been changed.
-
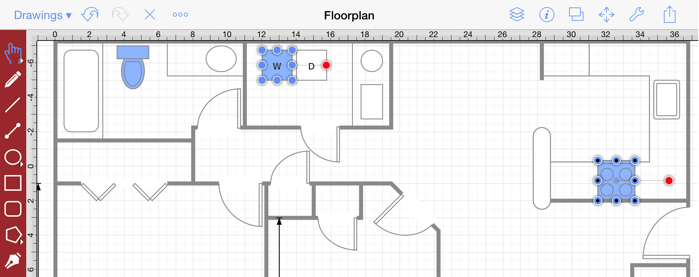
To remove a selection and continue making changes to the other selected figures, simply enable the Function Key Feature again and Tap on the desired figure. For this example, we will remove the Toilet in the Bathroom Area from the selected figures. Remove the utilized finger from the Drawing Toolbar when finished selecting or de-selecting figures in a drawing to disable the Function Key Feature.
For more information about the methods made available for selecting figures within TouchDraw, please refer to the Selecting a Figure page in this documentation.